

Building Computer Skills to Enable Success
Building Computer Skills to Enable Success
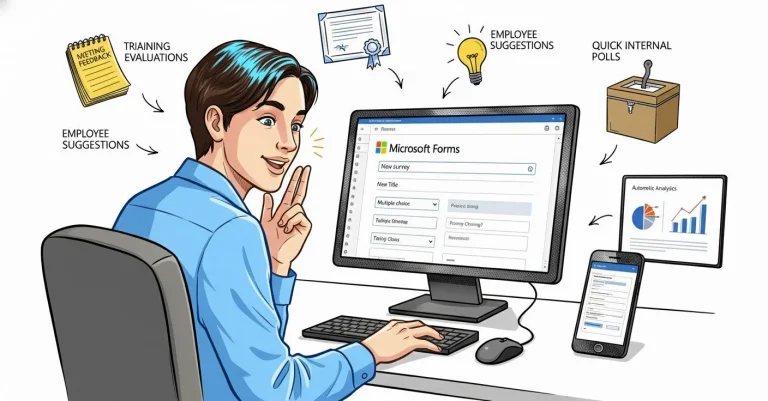
Many Microsoft Office 365 users have no idea that Microsoft Forms is included in their licence. Seriously! I’ve lost count of the number of times in my training sessions when I ask who’s using Forms and I get blank looks all around. At best, I might see a handful of people who started with it, got a bit lost and gave up.
Forms is part of your 365 suite, and it usually sits quietly in the background like that colleague who always gets invited to meetings but never seems to speak. Once someone (like me) points it out to you, suddenly you start thinking, “Hang on a minute… this could actually save me time”, quickly followed by “why are we paying extra for a third party forms solution?”
If your work involves collecting feedback, surveying your team, capturing information, or trying to avoid those dreaded email chains, Forms is one of the simplest tools at your disposal.
No coding. No complicated setup. No more spreadsheet wrangling (unless you really want to, or is that just me?). Just a simple and efficient data collection tool that works on any device.
Hi folks, Mark Finney here again. In this article, I’ll cover some of the key things you need to get started, with step-by-step instructions, some examples, and a few tips to encourage you to use the tool that’s probably been available to you all along.
Why use Microsoft Forms?
I’ll start with some of the key reasons you should think about using Forms:
- It’s included in most Office 365 plans
- It only takes a few minutes to create a survey
- It’s responsive, so it works on desktop, tablet and mobile
- It automatically charts your results
- You can export survey results directly into Excel
- You don’t need any technical experience
- Your responses are stored securely within Microsoft’s ecosystem
But maybe the biggest reason is that most people aren’t using it yet. That means you can big yourself up by creating a well-designed feedback form instead of sending out a messy email asking everyone to “reply with your thoughts”.
Where do Microsoft Forms Live?
You’d be surprised how many Office 365 users ask, “Do we even have this?” Yep! You do. It’s just that it doesn’t get in your face like the more well known apps like Excel and Word. Let’s face it, if you’ve ever logged in to Office.com and jumped into the start page, you’ll see that there is a lot of stuff there. It can be pretty overwhelming, so some folks just quietly close the page and go out for coffee before getting back to their inbox!
That’s why when I run training sessions, I often like to start by doing a bit of a walkthrough of the Microsoft 365 apps. It’s always fun to see the looks on peoples faces when I show them all the tools they have (and pay for) that they didn’t even know existed.
How to find Microsoft Forms
- Open your browser and go to office.com.
- Log in with your work account.
- Look for the Forms icon on the app launcher.
- If it’s not visible, select All apps, coz it’s definitely in there somewhere!
- Click Forms to open it.
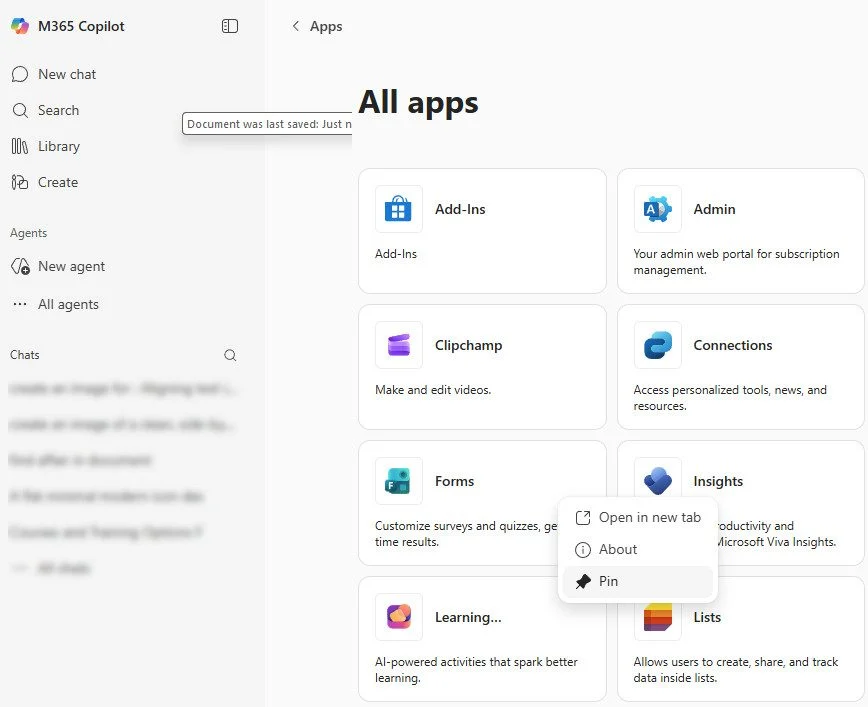
Tip: If you right-click the Forms icon, you can select Pin, to pin the app to the navigation bar so you don’t have to keep hunting for it every time.
Creating a Survey with Microsoft Forms
OK, assuming you found Forms, you can start setting up a new form. At the top of the screen, you’ll see some big buttons encouraging you to get started. Here’s what to do next.
- Click New Form.
- A blank, untitled form appears, along with a quick start section to help you get started.
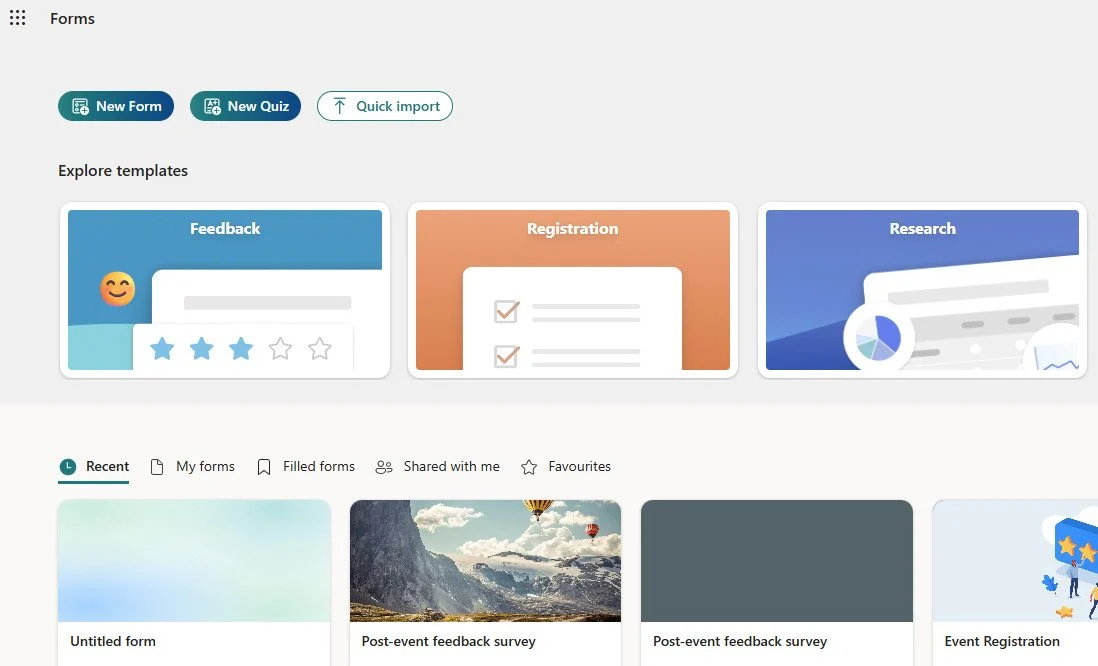
This is where things get interesting. Think of the blank form as a digital clipboard. You’re about to build something useful.
Building a Survey or Feedback Form
Add a title and description
At the top of your new form, click the title placeholder field and enter a meaningful name. For example:
- Project Feedback
- Team Pulse Check
- Training Session Evaluation
Below the title, you can add a short description explaining why the survey exists and how long it will take. People are far more likely to respond if you tell them it only takes a minute or two.
Add your questions
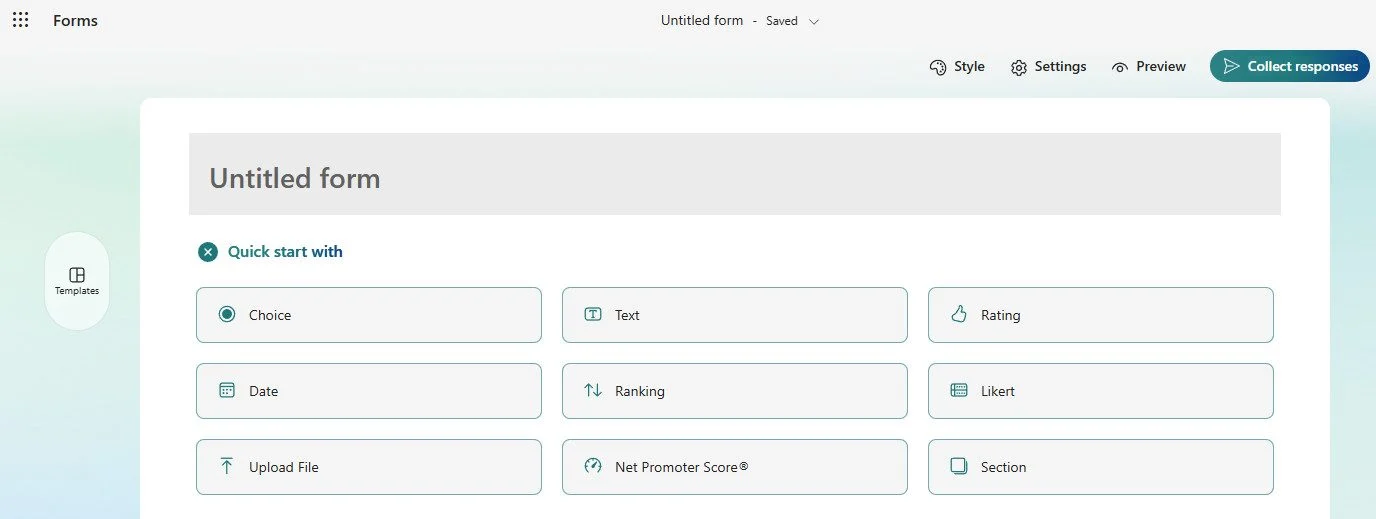
Click Add New and then select the type of question you want. Your main options are:
- Choice – multiple choice
- Text – open-ended
- Rating – stars, numbers or smiley faces
- Likert – agree/disagree scales
- Date – schedule or event questions
- Ranking – order of preference
Most business surveys tend to use a mix of Choice, Text, and Rating.
Example questions:
- How satisfied were you with today’s meeting? (Rating)
- What went well? (Text)
- What could we improve next time? (Text)
- How likely are you to recommend this process? (Choice or Rating)
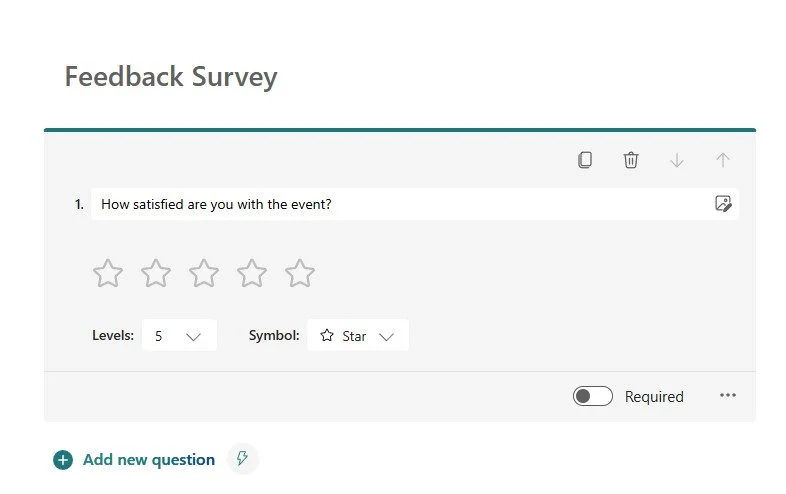
Tip: Text questions don’t need to be complicated. You want some insights, not War and Peace.
Use branching for flexible surveys
It makes sense for some questions to only appear based on a person’s answer; in that case, branching is your secret weapon.
For example, if someone responds with a rating of 1 or 2, you could ask:
“Sorry to hear that. What could we do better?”
To set this up:
- Choose the question you want to branch from.
- Click the … menu in the top-right corner.
- Select Branching.
- Choose what happens for each answer.
This feature keeps your survey relevant and avoids overwhelming people with lots of questions that don’t apply to them.
Adjust your form settings
Click Settings to fine tune the following:
- Who can respond (organisation only or anyone with the link)
- Whether responses are anonymous
- Whether to collect email addresses
- If people can submit only once
- Shuffle questions
- Custom thank-you message
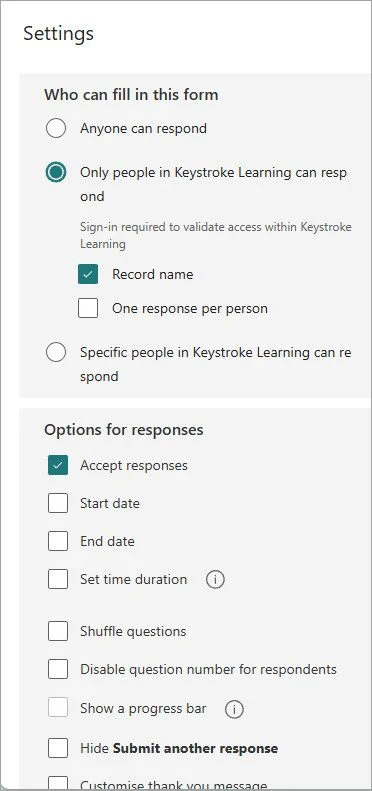
Tip: If you only want responses from colleagues, set “Only people in my organisation can respond”.
Preview the form
Before sending your survey out to the big wide world, preview it.
- Click Preview.
- Switch between computer and mobile views.
- You can even fill in the form with some sample data to check further.
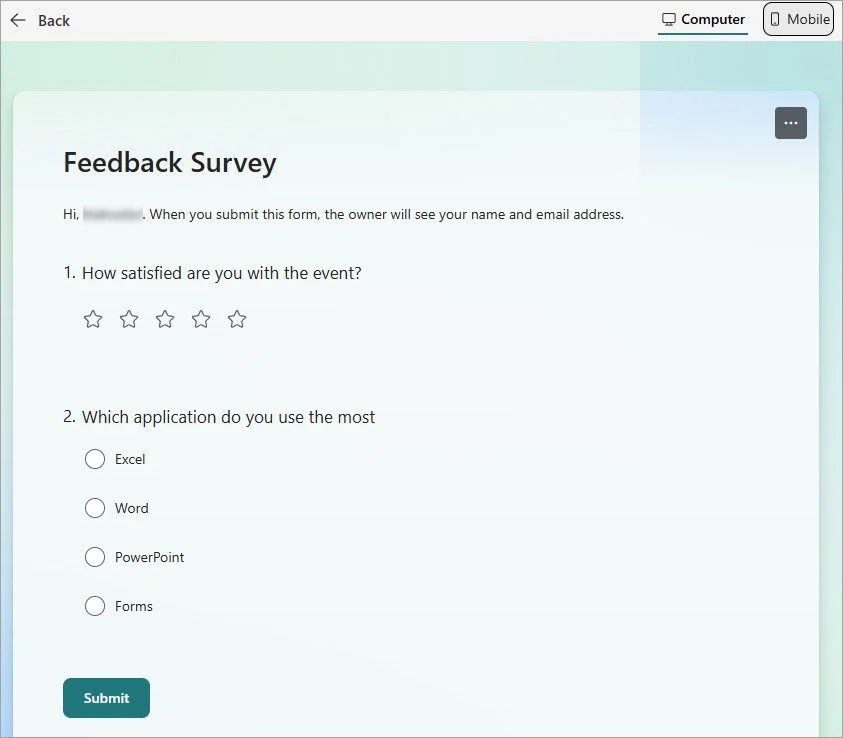
Previewing your form is always a good idea, since a quick check here can prevent awkward mistakes, like forgetting to rename “Untitled question”.
Sharing Your Survey
Once you’re happy with your form, you should be ready to collect some responses. Otherwise, why did you spend time building this survey in the first place?
Click Collect responses and choose how you want to distribute your form:
- Share via link – the easy method. Just copy and paste the link into Teams, email, SharePoint, or your newsletter.
- Share by email – this sends the form directly via Outlook.
- Share with a QR code – this is great for in-person training, conferences, or posters.
- Embed it – good for SharePoint sites, intranet pages, training hubs, and employee portals.
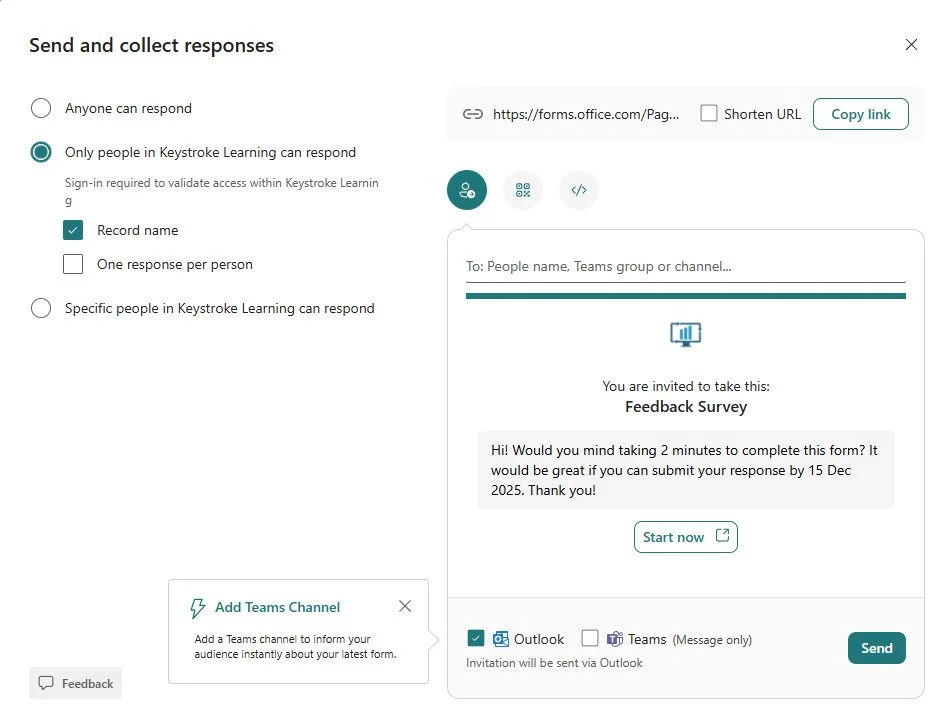
Tip: If you want responses without having to manually remind people, pin the link in a Teams channel.
Viewing and Analysing Results
One of the best things about Forms is that it can summarise everything for you.
Clicking on the Results tab will display a set of statistics:
- Automatic charts
- Average ratings
- Count of responses
- Text answers grouped neatly
- Time of submission
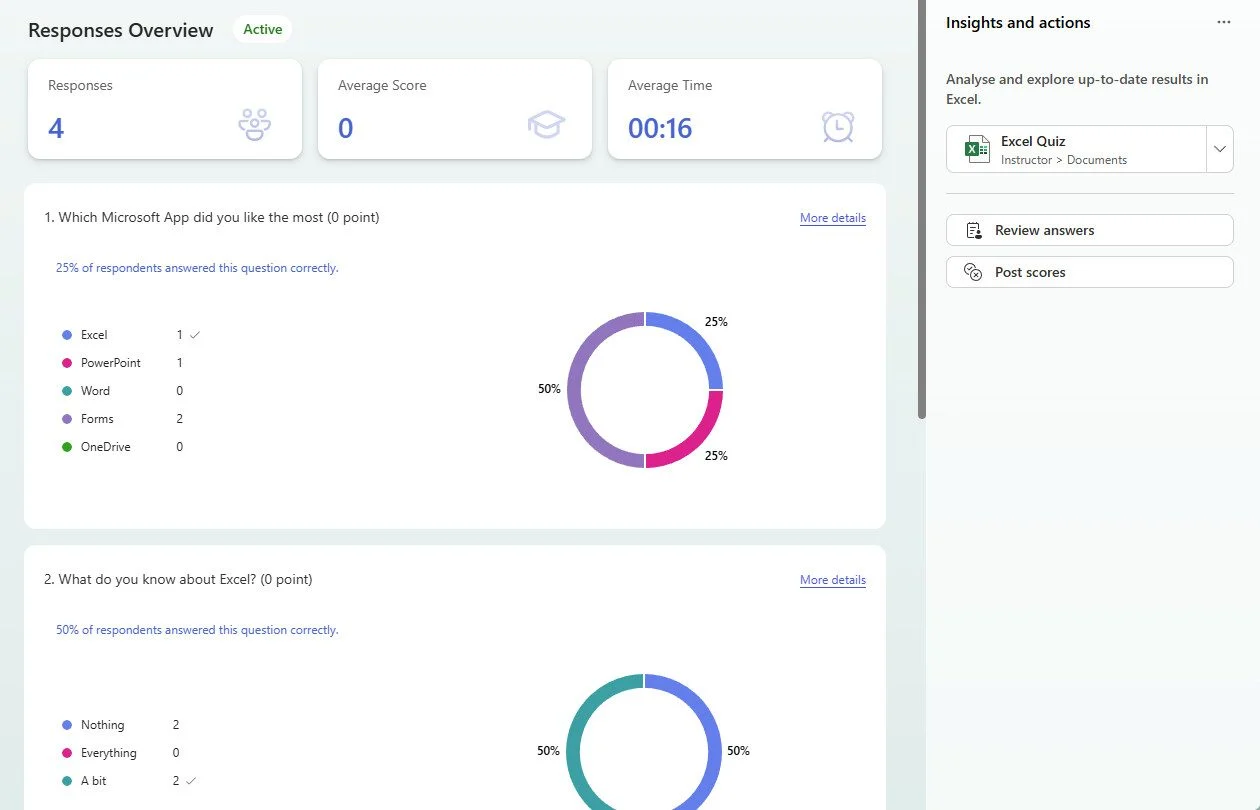
If you want to see more detail, you can click Open in Excel to create a spreadsheet to store the survey responses.
Using Excel to Explore Your Responses
Because everything exports neatly, you can explore trends easily. For example, you can:
- Sort by satisfaction score
- Filter by team or department
- Create conditional formatting to highlight low ratings
- Build a pivot table to find themes
- Add charts for presentations
This is handy when reporting back to managers, project sponsors, or stakeholders. It’s quick and efficient and makes you look extremely well-organised.
Practical Tips for Business Users
Microsoft Forms is great for a range of everyday business situations. Here are some quick examples you should try:
Meeting feedback
Useful for recurring meetings like:
- Monthly team catch-ups
- Project steering groups
- Community of practice sessions
Training evaluations
Great for:
- Office 365 courses
- Compliance training
- Soft skills workshops
- Internal knowledge sharing sessions
Registration forms
These are ideal for events, sessions, and workshops.
Process reviews
After completing a project or workflow, you can create a survey form to ask:
- What worked well?
- What slowed us down?
- What should we change for next time?
Employee suggestions
A simple form that can replace the dusty old suggestion box in the dark corner that no one even knows exists.
Quick internal polls
If your social committee needs to decide between doughnuts and muffins, Forms can be used to sort that too. The correct answer is always “doughnuts” by the way!
Keep in mind, Microsoft Forms has a range of templates for all kinds of business uses, including event registration and feedback surveys,
These can help you get started even faster, since most of the work has already been done for you.
How to Make Your Forms More Effective
A properly constructed form can improve the response rate significantly. I’ve included some suggestions to keep in mind when building your form.
Keep it short
- Three to six questions are usually enough for a feedback form.
- People appreciate getting right to the point, especially when they’re busy.
Use a mix of question types
- Variety keeps people engaged.
Explain why you’re collecting the feedback
- A small sentence can make a big difference.
Time your survey carefully
- If you send the survey at 4:59pm on a Friday, then don’t expect great results.
- Monday mornings are busy as well, so try for a day and time with a bit less going on.
Use anonymous responses when appropriate
- People are more honest when their name isn’t attached.
Customise the default closing message
- A friendly thank you goes a long way.
Why So Many 365 Users Aren’t Using Forms Yet
The biggest hurdle to using Microsoft Forms isn’t complexity, it’s awareness!
Many employees:
- Don’t even know the app exists
- Have never clicked “All apps”
- Don’t realise it’s included in their licence
- Assume surveys require specialist software
- Don’t feel confident with digital tools
Once they see how simple Forms is, they often become regular users.
Even one successful survey can spark a shift in how teams collect information.
Your role might even turn into “the person who knows how to make great forms”, which is not a bad title to have. Although, it might mean that everyone in the office now hits you up to build forms for them!
Conclusion
Microsoft Forms is one of the easiest tools to use in Office 365, but one of the most frequently overlooked. For general business users, it provides a simple way to collect feedback, conduct surveys, capture suggestions, and streamline communication.
With just a few steps, you can build something professional that works on any device and gives you clean data without fuss. And once your colleagues see how easy it is to respond, you’re more likely to get better feedback, and more of it.
Your take home learning opportunity (notice I did not say “homework”!)
Create a simple three question survey and send it to your team. You might be pleasantly surprised by the response, and you might even inspire a few colleagues to finally click that Forms icon they’ve never noticed before.